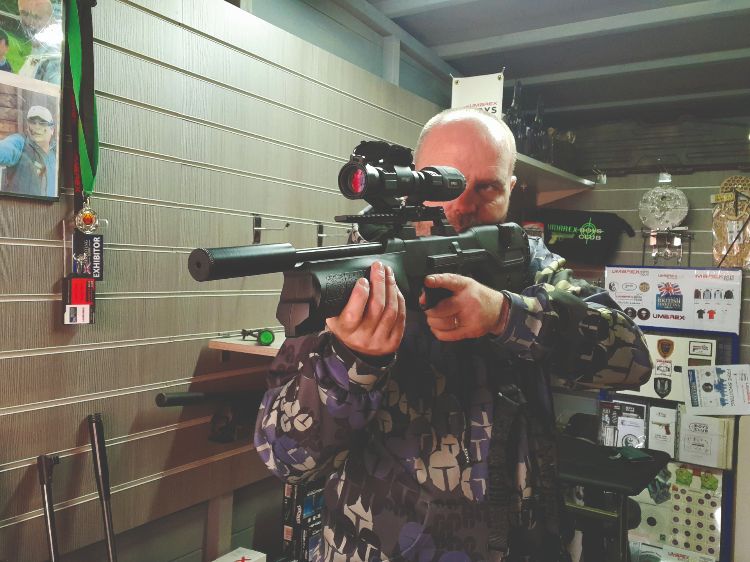
Here’s something a little different that you’ll see on an air rifle – a dot sight with a 3x magnifier! These are normally seen on airsoft rifles and on those CoD-type games, but I wanted to see how this would work on an air rifle, namely, my Walther Reign M2.
Firstly, lets explain the ins and outs of the set-up. The EPS3 comes in two parts that fits on to a Picatinny rail, and the most forward part is the dot sight, which has a 7-brightness switch – each turn brightens its intensity. Set at 1x magnification, you look through the lens with both eyes open at your intended target and the red dot is superimposed onto it. As with any other, the sight will need zeroing, but luckily for me, within my garden range, windage was spot on and elevation was only slightly out at 10m.
The rearward part is the 3x magnifier, which is set a few centimetres behind the dot sight. This can be manipulated to one side by the means of pulling the magnifier rearward, and pivoting over to the side. It is quite stiff to do, but the more you work it, the easier it will become. When the magnifier is pivoted away, the red dot is used as normal, and once in the closed position, the sight picture is magnified three times. One thing to note; the dot sight does come with flip-up covers, but the rear one can only be opened/closed when the magnifier is pushed over to the side. Within the box, you also get a small manual, stating all the workings and ‘how to’, so as always, ‘Read the Manual’!
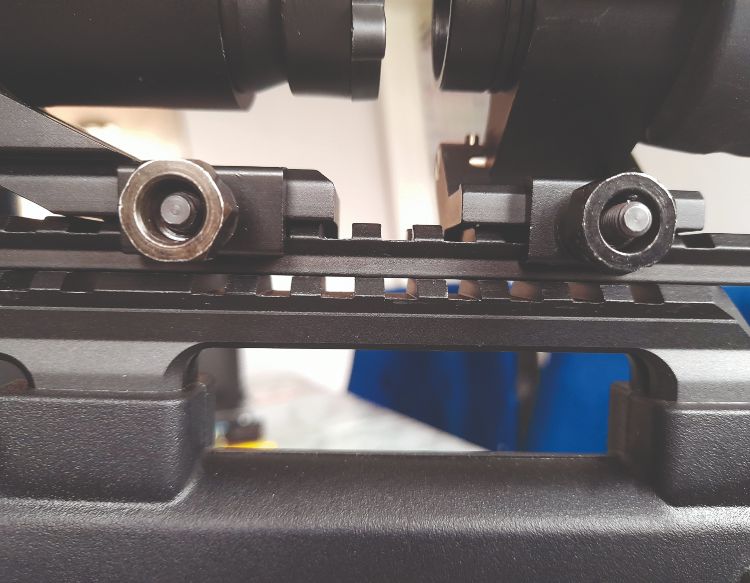 Line up the rails for perfect placement
STRANGE SENSATION
Fitting the EPS is simple enough, and as the sight comes on it is own rail, I married it up onto the Reign and noted which slots to put each part on the Reign’s rail, so I could keep the exact gap between the red sight and magnifier – now I have a spare Picatinny rail for any future projects, which is a bonus!
The EPS sits on the Reign really well, so I can get a great sight picture with just using the red-dot sight. With the magnifier in position, initially it’s a strange sensation with both eyes open because your brain is getting a mix of magnified and normal sight pictures, but closing one eye with the magnifier sorted that issue out, and it was an easy transition when going from magnified to unmagnified. The targets that I used were metal plates and paper targets, namely our Rifle Challenge set out at 10m.
The metal targets were set from 4m to 12m, and by using the brightest setting and switching between magnified and unmagnified, I was able to acquire targets quickly and efficiently, cocking the lever whilst going on to the next target. With the Rifle Challenge, I kept the magnifier on, lowered the brightness level so I could see the target bullseye clearer, and took my time – I got good results, well for me, anyway. I also did a bit of night shooting and because the Reign has long Picatinny pail, I was able to fit my Quick Release Walther Tactical Torch, with everything contained in one central spot – and that was a blast, too!
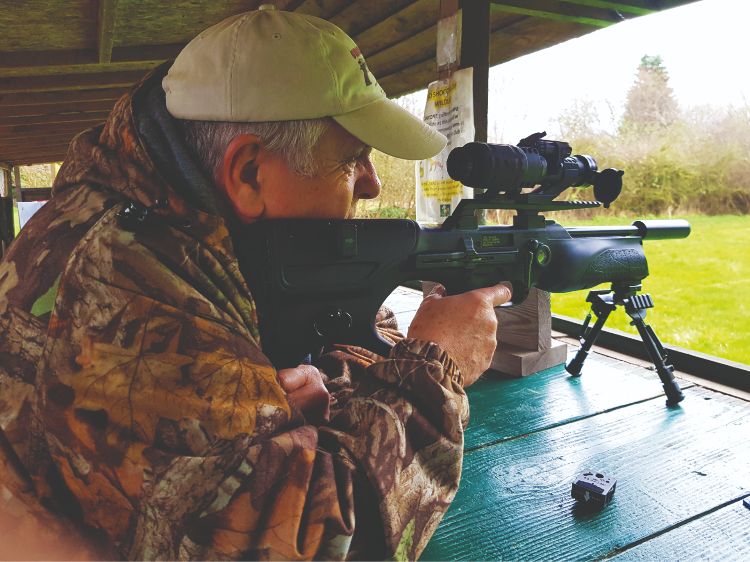 Jef trying out the set-up
RONNIE SUNSHINES OPEN DAY
Fast forward a few weeks and we were asked to run Ronnie Sunshines Open Day Ranges, so I decided to take this set-up to see what the general public thought of it, and to get a broader, honest opinion. The Evolution Point Sight 3 was gratefully received, and the majority liked the Reign M2 sighting combination and Walther bipod. People were hitting the smaller spinners and the bell target set out to Ronnie Sunshines maximum range of 20m, and I even managed to ring the bell target on my first shot, on an impromptu request. Call it luck? I’m calling it a perfect combination, honest. One gentleman said that he’d seen my video on our YouTube channel and was really happy to actually try it out. Again, he was able to hit what he was aiming for, and liked the concept of the magnifier, but he did note how stiff it was to transition the magnifier away from the red-dot sight. You do need to find the knack, and firm hold to move it, but the more it is used the easier it becomes.
 Great in Paddy's garden range
THE GREYHOUND
At the Open Day, we’d discussed the potential of this being a contender for pest control, especially for ratting and close-up barn work. Well, it’s definitely compact, and going by everyone’s shooting, it has the accuracy, So, where better to test it at an outdoor range than the Greyhound Gun Club in Coventry! It was raining and overcast, but the Greyhound has a vast array of plinking targets right out to about 75yds and the shooting benches are all undercover.
Firstly, I directed my shots toward a square metal plate target, which had a spinner in the middle, with four sections on plates around the spinner that moves slightly if hit, so you could see how far you were off ,if you missed the spinner – an ideal target for my testing due to not being able to place a paper target downrange. The distance was 15m, I was using 0.22 pellets, and the first shot went straight onto the spinner … second shot … third … fourth and fifth … all bang on target! Well, I knew that windage was fine and zero was set at a good enough range for this red-dot set-up.
I used the remaining five pellets in the magazine on a few other metal plates at further distances, and was able to hit them. I was flipping from unmagnified to magnified, although I still found it easier to close one eye when the sight was set up in the magnified position. I spent a good 30 minutes shooting at the various plates and HFT-type animal targets, to gauge where my hold-over/hold-under would be, and then Jef turned up and I let him have a go.
ON TO THE COURSE
Jef liked the red dot and remarked on how crisp the dot actually was. Like me, he was hitting the initial spinner with ease. He also noted that when using the magnifier, the dot became blurry, but he adjusted the focus on the magnifier which slightly improved it, and found that using one eye open made it better, too.
There was a break in the rain, so we went on to the FT/HFT course – we didn’t pick up any scorecards, but just picked out 30 targets to see how we got on. We started at the far end of the course, where it’s in woodland and I had the brightness setting up to ‘full’ for the first target, which was situated right inside the greenery, about 25 yards away. The dot was clearly visible on the yellow painted target, so I took the shot from a squatting position because someone (me) had forgotten to bring a shooting cushion and the floor was rather muddy, but I plated it so I was quite happy. Four more targets passed – ranging between 20 and 35 yards and all of them plated – clearly, I had my eye relatively on the mark, and on the fifth shot, I dropped the target at a distance of about 20 yards and I was rather chuffed.
That was my only dropped target, though. I had about six complete misses and rest were plated hits. Some of the shots I attempted were out to about 50 yards, and if I were to consider using this set-up for actual hunting, I wouldn’t even contemplate those long-distance shots. The ideal range for this rig is 25 yards, max, for hunting; any further and you’d need to do a lot of range time to work out where to position the dot off the intended target to get the hit – not the 30 minutes I’d just done! Having said that, I really enjoyed it and ticked off another potential concept for pest control in barns and farm buildings.
CONCLUSION
The Walther Reign and EPS3 has really good potential for all types of shooting. Getting the feedback along the way was invaluable, from customers at the Open Day and from Jef at the Greyhound Airgun Club, and I suggest that if you do set up EPS3 on your rifle, take the time to work out the ranges of where your point of aim and point of impact will be. As I said, this sighting system is more suited to semi-auto and airsoft guns, although I know this it’s staying on my Reign M2 for a good while. I intend to spend more time finding out the hold-overs and hold-unders off the bipod on all those targets on the plinking range!